Did you know that shocking your hot tub regularly can eliminate up to 90% of contaminants? I sure didn’t when I first got my hot tub!
Man, I thought I could just sit back and relax in that warm, bubbly water without a care in the world. Boy, was I wrong!
Let me tell you, there’s nothing worse than stepping into your hot tub after a long day, only to be greeted by cloudy water and a funky smell. Trust me, I’ve been there, and it’s not pretty.
That’s why I’m here to share everything I’ve learned about shocking your hot tub – whether you’re Team Chlorine or Team Bromine.
Shocking your hot tub is like giving it a deep cleanse. It’s not just about keeping the water crystal clear (though that’s a nice bonus).
It’s about zapping all those nasty contaminants that can turn your relaxing oasis into a breeding ground for bacteria. Yuck!
Now, I know what you’re thinking. “Shocking? Isn’t that something to do with electricity?” Nah, we’re not talking about turning your hot tub into a giant toaster here (please don’t try that at home, folks).
We’re talking about using specific chemicals to give your water a super-sanitizing boost.
Whether you’re a chlorine devotee or a bromine believer, I’ve got you covered. In this guide, we’ll dive into the nitty-gritty of hot tub shocking for both systems.
Because let’s face it, nobody wants to soak in a bacteria soup, right?
So buckle up, hot tub enthusiasts! We’re about to embark on a journey through the world of hot tub shocking.
By the time we’re done, you’ll be shocking your tub like a pro, and your water will be so clean you could practically drink it (but please don’t – that’s what water bottles are for).
Ready to turn your hot tub into the sparkling oasis of your dreams? Let’s dive in!
How to Shock Your Hot Tub
To shock your hot tub, first test and balance the water chemistry.
Then, measure the appropriate amount of shock treatment based on your tub’s volume (typically 1 oz per 500 gallons for chlorine systems or 1 oz per 300-400 gallons for bromine systems).
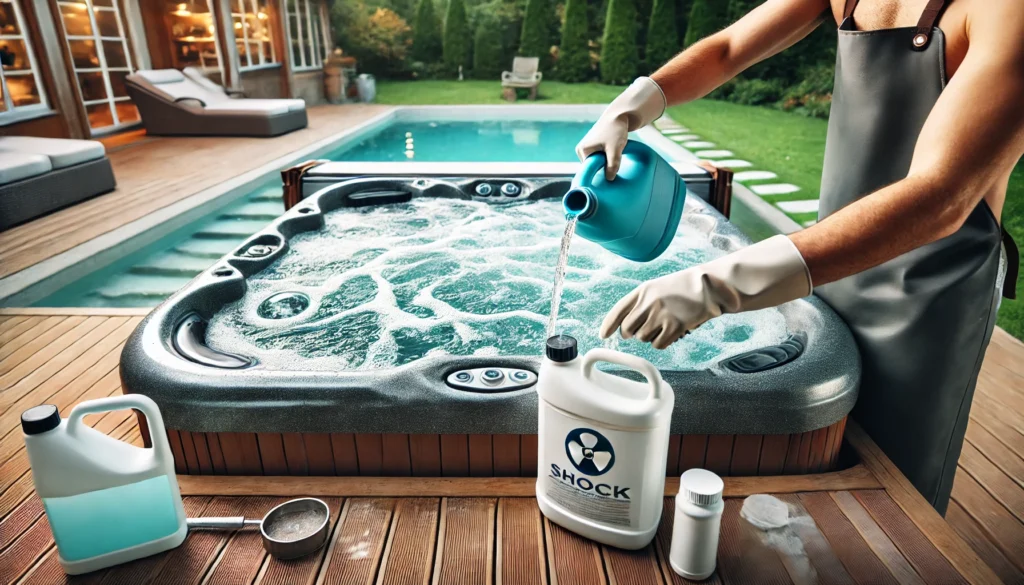
Turn on the jets and sprinkle the shock evenly around the tub’s perimeter. Run the jets for 15-20 minutes with the cover open.
Wait at least 20 minutes before closing the cover, and allow 24 hours before retesting the water and using the tub. Regular shocking, ideally weekly, maintains water clarity and hygiene.
Stick around as we dive deeper into the ins and outs of hot tub shocking, covering everything from choosing the right shock to troubleshooting common issues.
What Is Hot Tub Shocking?

Alright, let’s get down to the nitty-gritty of hot tub shocking.
When I first heard the term, I thought it had something to do with electricity and water – a combo that scared the living daylights out of me! But don’t worry, it’s way less terrifying than it sounds.
So, what exactly is shocking? Well, it’s basically giving your hot tub a super-strong dose of sanitizer to kill off all the gross stuff that’s built up over time.
Think of it as a reset button for your water. You’re blasting away contaminants, oxidizing organic matter, and giving those sanitizers a helping hand.
It’s like sending in the cavalry when your regular troops (your normal sanitizer levels) are getting overwhelmed.
Now, why is it necessary? Oh boy, let me tell you a story. I once thought I could skip shocking for a few weeks. Big mistake.
HUGE. My hot tub turned into something that looked like a swamp and smelled like a locker room. Not exactly the relaxing soak I was hoping for!
Shocking is necessary because it deals with all the stuff your regular sanitizer levels can’t handle on their own.
We’re talking about body oils, dead skin cells, cosmetics, and other organic matter that can build up over time.
Gross, right? Shocking also helps to eliminate chloramines or bromamines – those pesky compounds that can cause eye irritation and that funky “pool smell” we all know and hate.
So, how often should you shock your hot tub? Well, it depends on how much you use it. As a general rule of thumb, I shock my tub once a week.
But if you’re having a hot tub party or using it more frequently, you might want to shock it more often.
I remember one summer when I had friends over almost every weekend. My poor hot tub was working overtime!
I had to start shocking it twice a week to keep up with the increased bather load. Trust me, your nose (and your guests) will thank you for it.
One thing I’ve learned the hard way: don’t wait until your water looks or smells funky to shock it. By then, you’re already behind the eight ball.
Regular shocking is all about prevention. It’s like brushing your teeth – you don’t wait until you have a cavity to start, right?
Now, I know some of you might be thinking, “But isn’t shocking just adding more chemicals to my hot tub?” And you’re not wrong.
But here’s the thing: when done correctly, shocking actually helps reduce the overall amount of chemicals you need to use.
It’s like hitting a reset button, allowing your regular sanitizer to work more effectively.
So, there you have it – the what, why, and when of hot tub shocking. It might seem like a chore, but trust me, it’s a small price to pay for crystal-clear, hygienic water.
And once you get into the habit, it’ll become second nature.
Just remember: a well-shocked tub is a happy tub. And a happy tub means happy soakers. Now, who’s ready to dive into the how-to? Let’s roll up our sleeves and get shocking!
Preparing to Shock Your Hot Tub
Alright, folks, let’s talk prep work. I know, I know, it’s not the most exciting part, but trust me, a little preparation goes a long way when it comes to shocking your hot tub.
Think of it like cooking – you wouldn’t start making a fancy meal without prepping your ingredients first, right?
First things first: safety. I can’t stress this enough. We’re dealing with chemicals here, people! I learned this the hard way when I once decided to shock my tub in my favorite swimsuit.
Let’s just say that swimsuit is now a lovely tie-dye pattern that was definitely not intentional. So, here’s what you need:
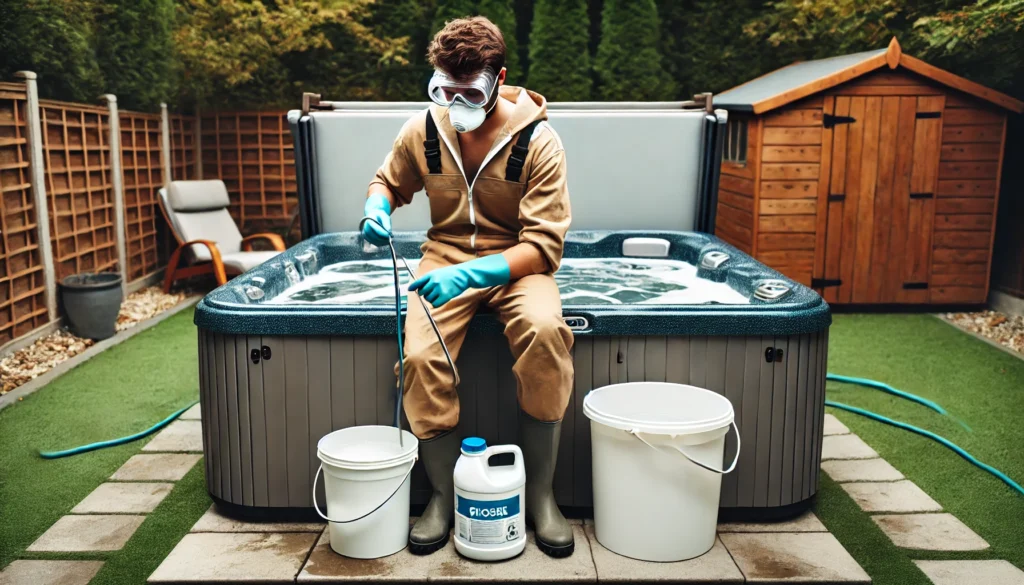
- Safety goggles: Protect those peepers!
- Chemical-resistant gloves: Your hands will thank you.
- Old clothes: Trust me on this one.
- A well-ventilated area: If possible, open the hot tub cover fully.
Now that you’re geared up like a sexy scientist (hey, safety can be attractive!), let’s gather our supplies. You’ll need:
- Your shock treatment of choice (we’ll get into the specifics later)
- A clean bucket for mixing (if required)
- A long-handled stirrer (an old broom handle works great)
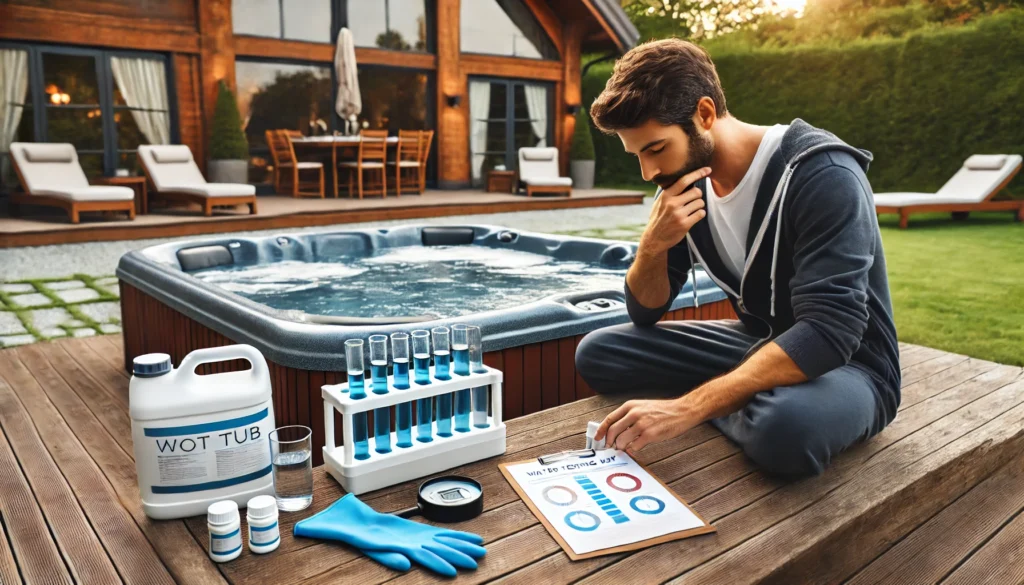
- Your water testing kit
Speaking of water testing, this is crucial. You wouldn’t add salt to your food without tasting it first, would you?
Same principle applies here. Before you shock, you need to know what you’re working with.
Test your water for pH, alkalinity, and sanitizer levels. I use test strips because they’re quick and easy, but a liquid test kit works too. Aim for:
- pH: 7.2-7.8
- Alkalinity: 80-120 ppm
- Chlorine: 1-3 ppm or Bromine: 3-5 ppm
If these levels are way off, you might need to adjust them before shocking. It’s like trying to build a house on a wonky foundation – it just won’t work right.
Oh, and here’s a pro tip I wish someone had told me earlier: always add chemicals to water, never water to chemicals.
I once did it the other way around and ended up with a mini volcano in my bucket. Not fun, and definitely not safe!
Another thing: make sure your filters are clean. Dirty filters are like a clogged nose – they just can’t do their job properly.
I usually give mine a quick rinse before shocking. It’s a small step that makes a big difference.
Lastly, timing is everything. Plan to shock your tub when you won’t be using it for at least 24 hours.
I usually do it on a weekday evening, so it’s ready for weekend relaxation. There’s nothing worse than having a beautifully shocked tub and not being able to use it!
So there you have it – you’re all prepped and ready to go. See, that wasn’t so bad, was it? Now comes the fun part (well, fun for hot tub nerds like me). Let’s get shocking!
Step-by-Step Guide for Chlorine Users
Alright, Team Chlorine, this one’s for you! If you’re using a chlorine system in your hot tub, you’re in for a treat.
Shocking a chlorine hot tub is like giving it a superhero power-up. Let’s dive in!
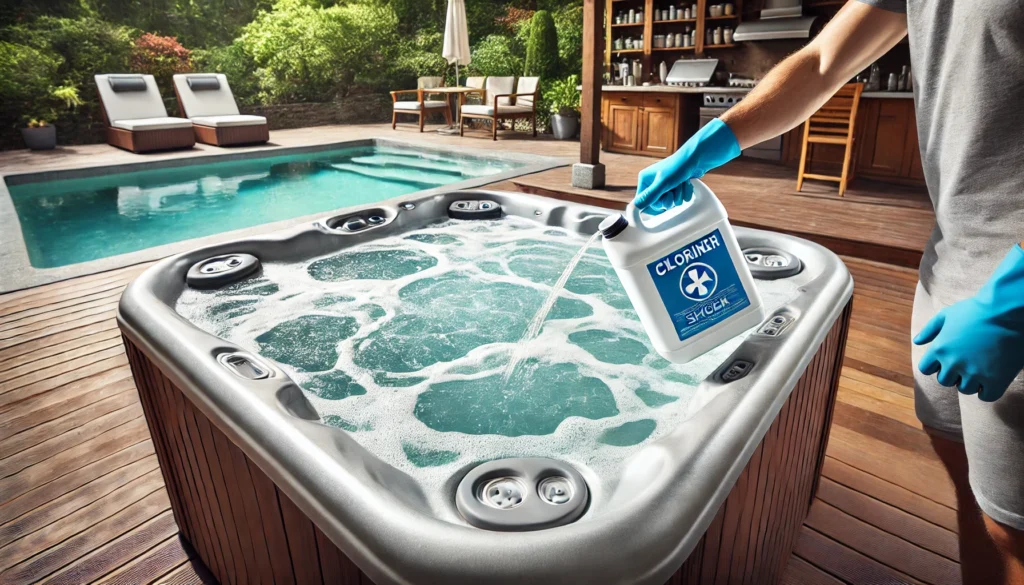
First things first, you need to choose the right chlorine shock. Now, I’ve tried a few in my time, and let me tell you, not all shocks are created equal.
I personally prefer a fast-dissolving, pH-neutral shock. It’s like the superhero of the shock world – gets the job done without messing up your water balance.
Calculating the right dosage is crucial. Too little, and you’re wasting your time. Too much, and you might as well be swimming in a pool of bleach (not recommended, trust me).
Most shocks will tell you how much to use per volume of water. But here’s a tip: I always measure my hot tub’s actual water volume rather than going by the manufacturer’s specs.
You’d be surprised how much it can differ!
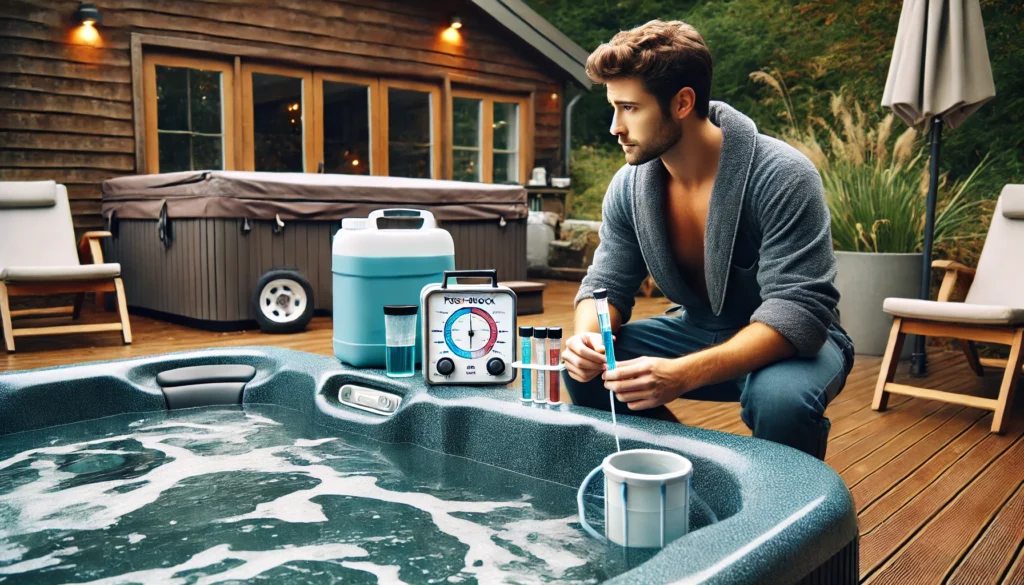
Now, let’s get down to the nitty-gritty. Here’s my step-by-step process:
- Test your water. I know we did this in the prep stage, but trust me, double-checking never hurts.
- Calculate your dosage. I use about 1 ounce of shock per 500 gallons of water. But always check your product’s instructions!
- Turn on your jets. We want that water circulating like a whirlpool.
- Carefully measure out your shock. I use a clean plastic cup – no guesswork here!
- Slowly sprinkle the shock around the edges of the tub. Don’t just dump it in one spot, unless you want a bleach bomb in your tub.
- Let it circulate. I usually let the jets run for about 15-20 minutes.
- Open the cover (if it isn’t already) and let the tub breathe for a couple of hours. This lets any excess chlorine gas escape.
Now, here’s where patience comes in. I know you’re itching to jump in, but hold your horses! You need to wait until the chlorine levels come back down to normal (1-3 ppm).
This usually takes about 24 hours, but can be longer if you’ve used a hefty dose.
I once got impatient and hopped in too soon after shocking. Let’s just say my skin was not happy, and neither was my favorite swimsuit. Lesson learned!
While you’re waiting, it’s a good idea to give your filter a rinse. All that shock has probably dislodged a bunch of gunk, and your filter’s been working overtime.
Think of it as a spa day for your filter – it deserves some TLC too!
Now, let’s talk about post-shock maintenance. This is where a lot of folks drop the ball, but it’s crucial for keeping your water crystal clear. Here’s what I do:
- After 24 hours, test your water again. You’re looking for chlorine levels between 1-3 ppm. If it’s higher, wait a bit longer. If it’s lower, you might need to add a bit more sanitizer.
- Check your pH and alkalinity. Shocking can sometimes throw these off, so you might need to adjust.
- Run your jets for about 15 minutes a day for the next few days. This helps circulate the water and ensures all areas of your tub got the shock treatment.
- Keep an eye on your water clarity. If it starts to get cloudy again quickly, you might have an underlying issue that needs addressing.
I remember one time I skipped the post-shock maintenance, thinking “Eh, I just shocked it, it’ll be fine.”
Big mistake! A week later, my tub was cloudier than pea soup. Trust me, a little effort now saves a lot of headache later.
Oh, and here’s a pro tip: keep a log of when you shock and what the water readings are before and after.
I know it sounds nerdy (guilty as charged!), but it really helps you get a feel for your tub’s patterns. Plus, it’s super satisfying to see those numbers improve over time.
Now, I know some of you might be thinking, “Can’t I just shock more often to keep the water extra clean?” I get the temptation, I really do.
But over-shocking can be just as bad as under-shocking. It can lead to equipment damage, wasted chemicals, and some seriously unhappy skin.
Stick to the recommended schedule unless you have a specific reason to shock more frequently.
Lastly, don’t forget about your hot tub cover! After shocking, give it a quick wipe down on the underside.
This prevents any chlorine gas from corroding the cover over time. It’s a small step that can seriously extend the life of your cover.
So there you have it, my fellow chlorine enthusiasts! Follow these steps, and you’ll be well on your way to hot tub nirvana.
Remember, consistency is key. Shock regularly, maintain properly, and your hot tub will be your own little slice of backyard paradise. Now, who’s ready for a soak?
Step-by-Step Guide for Bromine Users
Alright, Team Bromine, it’s your turn! I’ve got to admit, I was a chlorine guy for years before I switched to bromine.
And let me tell you, it was like discovering a whole new world. Bromine’s like the chill cousin of chlorine – it gets the job done, but with a bit more finesse.
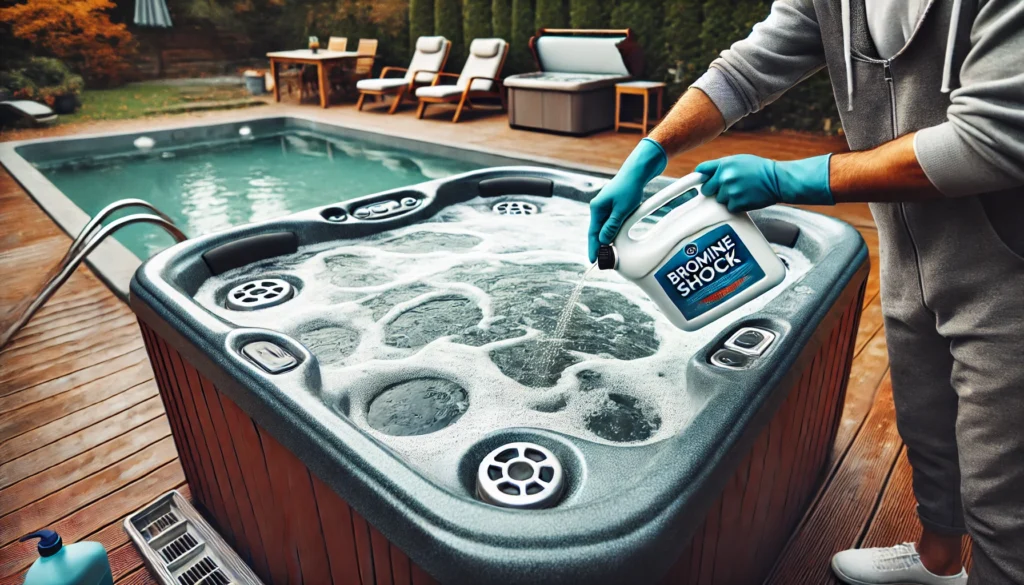
First up, let’s talk about selecting the right bromine shock. Now, here’s where it gets interesting.
You’ve got two main options: you can use a bromine shock (sodium bromide) or a non-chlorine shock (potassium monopersulfate).
I’ve tried both, and honestly, they both work great. The non-chlorine shock is my go-to these days because it’s a bit gentler and doesn’t have that strong chemical smell.
Determining the correct amount is crucial. Remember, bromine’s a bit different from chlorine – a little goes a long way.
I usually use about 1 ounce of shock per 300-400 gallons of water. But always, ALWAYS check your product’s instructions.
I learned this the hard way when I once used way too much and ended up with a tub that smelled like a chemistry lab. Not exactly the relaxing soak I was hoping for!
Now, let’s get into the nitty-gritty of the shocking process:
- Test your water. Yes, again. Trust me on this one.
- Calculate your dosage based on your tub’s volume.
- Fire up those jets! We want that water moving.
- Measure out your shock. I use a dedicated measuring cup for this – no kitchen utensils near the chemicals, folks!
- Sprinkle the shock around the perimeter of the tub. Don’t just dump it in one spot, unless you want a bromine bomb in your tub.
- Let it circulate for about 15-20 minutes with the jets on high.
- Open up that cover and let your tub breathe for a couple of hours.
Now, here’s where bromine users have a bit of an advantage. You don’t have to wait as long before jumping back in!
Usually, 2-3 hours is enough time for the shock to do its thing and for the levels to stabilize. But always, always test before you take a dip.
Speaking of testing, after shocking, you’re aiming for a bromine level of 3-5 ppm. If it’s higher, give it a bit more time. If it’s lower, you might need to add a bit more sanitizer.
Here’s a cool thing about bromine: it keeps working even after the initial shock. It forms these things called bromamines, which, unlike chloramines, are still effective sanitizers.
It’s like getting a two-for-one deal on your sanitizing!
Now, let’s talk post-shock care. This is where a lot of folks drop the ball, but it’s crucial for keeping your water in tip-top shape:
- Test your water again after a few hours. You’re looking for that sweet spot of 3-5 ppm bromine.
- Check your pH and alkalinity. Shocking can sometimes throw these off, so you might need to make some adjustments.
- Run your jets for about 15 minutes a day for the next few days. This helps distribute the bromine evenly throughout your tub.
- Keep an eye on your water clarity. If it starts to get cloudy again quickly, you might have an underlying issue that needs addressing.
I remember when I first switched to bromine, I was amazed at how much longer my water stayed clear between shocks. It was like my hot tub had found its zen or something.
Oh, and here’s a pro tip: if you’re using bromine tablets in a floater, take it out before you shock. Then put it back in about an hour after shocking.
This prevents the shock from breaking down the tablets too quickly.
Lastly, don’t forget about your hot tub cover! Give it a quick wipe down on the underside after shocking. This prevents any chemical buildup and keeps your cover in good shape.
So there you have it, my bromine buddies! Follow these steps, and you’ll be well on your way to hot tub bliss. Remember, consistency is key.
Shock regularly, maintain properly, and your hot tub will be your own little oasis of relaxation. Now, who’s ready for a nice, bromine-sanitized soak?
Common Mistakes to Avoid
Alright, hot tub enthusiasts, gather ’round. It’s time for a little heart-to-heart about the mistakes I’ve made (so you don’t have to).
Trust me, I’ve committed just about every hot tub faux pas in the book, and I’m here to save you from the same fate.
First up: overdosing. Oh boy, have I been there. I once thought, “If a little shock is good, a lot must be better!” Wrong.
So, so wrong. I ended up with a tub full of foam and water that smelled like a public pool on steroids.
Not to mention, my skin was NOT happy. The lesson? More isn’t always better. Stick to the recommended dosage, folks.
On the flip side, we’ve got underdosing. This is like trying to clean your house with a single drop of soap.
Sure, you’re doing something, but it’s not gonna cut it. I went through a phase where I was trying to save money by using less shock.
Spoiler alert: I ended up spending more in the long run trying to fix the cloudy, smelly mess I created. Don’t be cheap with your shock, people. Your hot tub (and your nose) will thank you.
Next up: improper timing. I used to shock my tub right before I wanted to use it. Logical, right? Wrong again. Shocking needs time to work its magic.
Jumping in too soon is like hopping into a chemical bath. Not fun, and definitely not good for you. Give it at least a few hours (preferably overnight) before you take a dip.
Here’s another biggie: neglecting water balance. I used to think shocking was a cure-all. Cloudy water?
Shock it. Weird smell? Shock it. But here’s the thing: if your pH, alkalinity, or calcium hardness is off, shocking is like putting a band-aid on a broken leg.
It might help a little, but it’s not solving the real problem. Always, ALWAYS check and adjust your water balance before shocking.
Oh, and let’s not forget about circulation. I once shocked my tub and then immediately turned off the jets and closed the cover, thinking I was trapping in all that sanitizing goodness.
Nope. All I did was create a concentrated pool of chemicals in one spot. Always run your jets for a while after shocking to distribute the chemicals evenly.
Here’s one that took me way too long to figure out: shocking with the wrong product. Did you know that there are different types of shock for chlorine and bromine systems?
I didn’t, at first. I was using chlorine shock in my bromine tub and wondering why it wasn’t working as well as it should. Face, meet palm.
Lastly, let’s talk about frequency. I went through a phase where I only shocked my tub when it started to look a little funky. Bad move.
Regular shocking is like regular teeth brushing – it prevents problems before they start. Don’t wait until your water looks like pea soup to shock it.
Now, I know what some of you might be thinking: “But what if I forget to shock my tub regularly?” Been there, done that. Here’s a tip: set a reminder on your phone.
I do mine every Sunday evening. It’s become such a routine that now I feel weird if I don’t do it.
Remember, folks, maintaining a hot tub is a bit of an art form. It takes practice, and yes, you’ll probably make some mistakes along the way. But that’s okay! Each mistake is a learning opportunity.
And trust me, once you get it right, there’s nothing better than sinking into crystal clear, perfectly balanced hot tub water. It’s like a warm hug for your entire body.
Oh, and here’s one last mistake that I just have to mention: ignoring your nose. Your nose is like a built-in hot tub monitor.
If your water smells funky, don’t ignore it! I once thought I could power through a slightly off smell. Big mistake.
By the time I got around to shocking, I was dealing with a full-blown algae situation. Not fun, and definitely not easy to fix.
So there you have it, my hot tub comrades. Learn from my mistakes, and your hot tub journey will be a whole lot smoother.
Remember, a well-maintained hot tub is a happy hot tub, and a happy hot tub means happy soakers. Now, who’s ready to shock their tub like a pro?
Maintaining Your Hot Tub Between Shocks
Alright, hot tub aficionados, let’s talk about what happens between those shocking sessions. Because let’s face it, shocking is just one part of the hot tub maintenance puzzle.
It’s like brushing your teeth – super important, but you still gotta floss and use mouthwash, right?
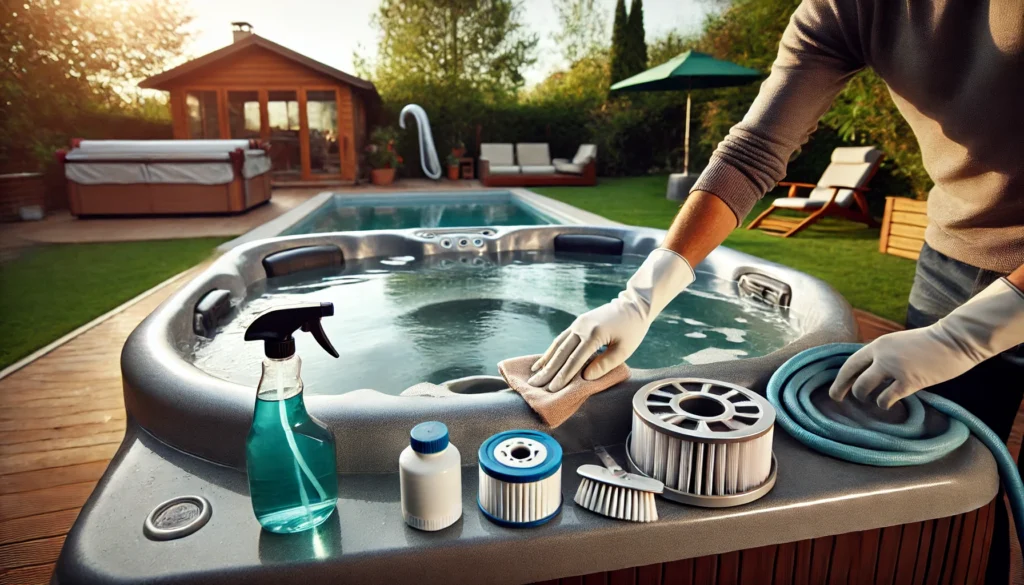
First up: regular cleaning routines. I know, I know, it’s not the most exciting part of hot tub ownership. But trust me, a little elbow grease goes a long way. I make it a habit to wipe down the waterline every week.
You know that scummy line that forms right at water level? Yeah, that’s a breeding ground for bacteria. A quick wipe with a soft cloth or sponge keeps it at bay.
And don’t forget about the shell! I give mine a good scrub every month or so. Just be sure to use a non-abrasive cleaner – your hot tub’s finish will thank you.
learned this the hard way when I once used a regular bathroom cleaner and ended up with some nasty scratches. Oops!
Now, let’s talk about the heart of hot tub maintenance: balancing water chemistry. This is where a lot of folks get overwhelmed, but I promise it’s not as complicated as it seems.
I test my water at least twice a week – more if I’ve been using the tub a lot. Here’s what I’m looking for:
- pH: You want this between 7.2 and 7.8. I aim for 7.4-7.6.
- Alkalinity: Shoot for 80-120 ppm.
- Sanitizer levels: 1-3 ppm for chlorine, 3-5 ppm for bromine.
- Calcium hardness: 150-250 ppm is the sweet spot.
I use test strips because they’re quick and easy, but a liquid test kit works great too. Just find what works for you and stick with it.
Here’s a pro tip: keep a log of your water readings. I know it sounds nerdy (guilty as charged!), but it really helps you spot trends and catch potential issues early.
Plus, it’s oddly satisfying to see those numbers line up perfectly.
Let’s not forget about filtration – the unsung hero of hot tub maintenance. Your filter is working hard 24/7 to keep your water clean, so show it some love! I rinse mine off weekly with a hose.
And every month, I give it a deep clean with a filter cleaner solution. It’s like a spa day for your filter!
Oh, and here’s something I wish someone had told me earlier: pay attention to your water level.
If it gets too low, your pump could burn out, and trust me, that’s a headache you don’t want. I make it a habit to check my water level every time I test the chemistry.
If it’s looking a little low, I top it off.
Now, let’s talk about the oft-forgotten hot tub cover. This bad boy is your first line of defense against debris and evaporation.
I give mine a good wipe down every week and treat it with a vinyl protectant every few months. It keeps it looking good and prevents it from drying out and cracking.
And here’s a little secret: your hot tub needs to breathe sometimes. I make it a point to remove the cover for a few hours every week, usually when I’m doing my weekly maintenance.
It helps prevent mold and mildew growth underneath.
Lastly, don’t forget about the plumbing! Every few months, I use a line flush product to clean out any gunk that’s built up in the pipes.
It’s like giving your hot tub a good internal cleanse. Trust me, you’ll be amazed (and possibly grossed out) by what comes out!
Remember, consistency is key when it comes to hot tub maintenance. It might seem like a lot at first, but once you get into a routine, it becomes second nature.
And the payoff? Crystal clear water that’s always ready for a relaxing soak.
So there you have it, my hot tub maintenance manifesto. Follow these tips, and you’ll be well on your way to becoming a hot tub maintenance master.
Your tub will thank you, and so will your stress levels when you sink into that perfectly maintained water. Now, who’s ready for a dip?
Troubleshooting Post-Shock Issues
Alright, hot tub heroes, let’s talk about what to do when things don’t go quite as planned after shocking your tub.
Because let’s face it, sometimes life throws you a curveball, and your hot tub decides to rebel.
Don’t worry, though – I’ve been there, done that, and I’m here to guide you through the murky waters (pun intended).
First up: cloudy water. This is probably the most common issue I’ve dealt with post-shock.
You’ve done everything right, but your water looks like someone poured a gallon of milk into it. Frustrating, right?
Here’s what I do:
- Check your filter. A dirty filter can’t do its job properly. Give it a good rinse or even a deep clean.
- Test your water balance. Sometimes shocking can throw off your pH or alkalinity. Adjust as needed.
- Run your jets. Sometimes all your water needs is a good circulation boost.
- If all else fails, a dose of water clarifier can work wonders. Just be sure to follow the instructions carefully.
I once had a cloudy water situation that just wouldn’t clear up. Turns out, my filter was on its last legs and needed replacing. Lesson learned: sometimes the simplest solution is the right one.
Next up: strong chemical odor. If your hot tub smells like a swimming pool on steroids after shocking, something’s not quite right. Here’s what to check:
- Your sanitizer levels. If they’re too high, you might need to wait a bit longer before using the tub.
- pH levels. If your pH is off, it can cause your sanitizer to give off a strong smell.
- Presence of chloramines or bromamines. These are the results of your sanitizer combining with contaminants, and they can smell pretty funky.
I once made the mistake of shocking my tub and then closing the cover immediately. The smell when I opened it the next day was eye-watering!
Now I always leave the cover open for a few hours after shocking to let those chemical smells dissipate.
Now, let’s talk about skin or eye irritation. This is not fun, and it’s definitely not what you want from a relaxing soak. If you’re experiencing this after shocking, here’s what might be going on:
- Your sanitizer levels might be too high. Give it some more time to come down before you hop in.
- Your pH might be off. Aim for 7.4-7.6 for the most comfortable soaking.
- You might have an buildup of chloramines or bromamines. A good shock should take care of this, but sometimes you need to shock again.
I learned about pH the hard way when I once shocked my tub and then jumped in too soon. My skin was itchy for days! Now I always, always test before I soak.
Here’s a weird one I encountered once: foamy water after shocking. It was like I was sitting in a giant bubble bath!
Turns out, this can happen if there’s a buildup of organic matter in your water. The solution? A good dose of anti-foam treatment and maybe another shock once the foam clears up.
Oh, and here’s one that threw me for a loop: green water after shocking. Panic stations, right? Turns out, this can happen if you have a lot of metals in your water source.
The shock oxidizes the metals, turning your water a lovely shade of swamp.
The fix? A metal sequestrant product and possibly a filter clean.
Lastly, let’s talk about stubborn stains that appear after shocking. This happened to me once – I shocked my tub and suddenly had these weird brown stains on the shell.
Turns out, the shock had oxidized some minerals in my water, causing them to stick to the surface. A bit of stain remover and some elbow grease took care of it.
Remember, troubleshooting is all part of the hot tub journey. Don’t get discouraged if things don’t go perfectly every time.
Each issue is a chance to learn more about your tub and become a better hot tub owner. And trust me, once you’ve overcome a few challenges, that perfect soak feels even more rewarding.
So there you have it, my fellow hot tub enthusiasts. Armed with this knowledge, you’re ready to tackle any post-shock issues that come your way. Now, who’s ready for a trouble-free soak?
Environmental Considerations
Alright, eco-warriors and hot tub lovers, let’s chat about keeping our hot tubs clean while also being kind to Mother Nature.
Because let’s face it, we all want to relax in our tubs without feeling guilty about our environmental impact, right?
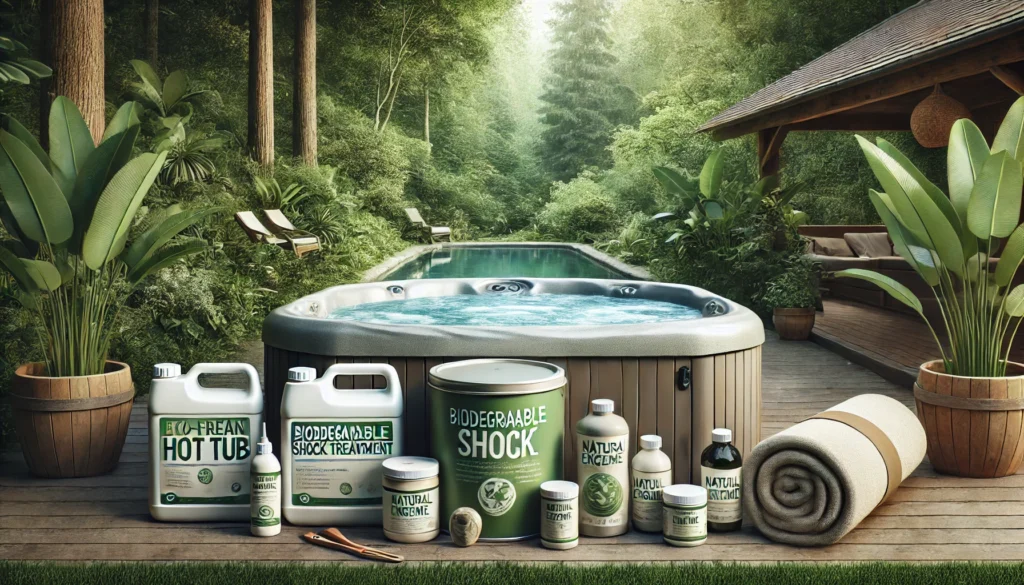
First up, let’s talk about eco-friendly shocking options. When I first started my hot tub journey, I didn’t even know these existed!
But let me tell you, they’re game-changers. There are some great non-chlorine shock products out there that are biodegradable and much gentler on the environment.
I switched to one of these a while back, and not only does it work great, but I also sleep better knowing I’m not dumping harsh chemicals into the environment.
Now, don’t get me wrong – these eco-friendly options might cost a bit more upfront. But in my experience, they’re totally worth it. Plus, they often require smaller doses, so a little goes a long way.
Here’s a cool trick I learned: you can actually use household hydrogen peroxide as a shock treatment! It’s super eco-friendly and breaks down into just water and oxygen.
Just make sure you get the 35% food-grade stuff, not the 3% you find at the drugstore. And as always, follow the dosage instructions carefully.
Let’s talk about water conservation. This might not seem directly related to shocking, but hear me out. The less often you need to drain and refill your tub, the less shock you’ll use over time.
I’ve found that really staying on top of my water chemistry and filtration means I can go longer between full water changes. It’s a win-win – less work for me, and less water waste!
Oh, and here’s something I wish I’d known earlier: natural enzymes can be your best friend when it comes to reducing chemical use.
These little guys break down organic contaminants in your water, meaning you need less shock and sanitizer overall. I add a weekly dose of enzymes to my tub, and it’s made a huge difference.
Now, let’s chat about proper disposal of chemicals. This is super important, folks. Never, ever dump unused chemicals or tub water with high chemical content directly into the environment. It can harm plants, animals, and even contaminate groundwater.
I learned this the hard way when I once drained my over-chlorinated tub onto my lawn… let’s just say that patch of grass didn’t fare too well.
So, what do you do with leftover or expired chemicals? Many communities have hazardous waste disposal sites that will take them. I make it a point to check my local disposal guidelines every so often, just to make sure I’m doing the right thing.
Here’s a tip for reducing chemical waste: only buy what you need. I used to stock up on shock like I was preparing for the apocalypse, but then half of it would expire before I could use it.
Now I buy smaller quantities more frequently. Less waste, and I always have fresh product on hand.
Let’s not forget about energy efficiency. While this might not directly relate to shocking, using less energy means less environmental impact overall.
I invested in a good-quality, well-insulated cover for my tub, and it’s made a huge difference in my energy consumption.
Less heat loss means less power used, which means less environmental impact. Plus, my energy bills thanked me!
Lastly, consider the lifecycle of your hot tub products. Look for shock treatments that come in recyclable containers.
And when it’s time to replace your filter, check if there are any recycling options in your area. Every little bit helps!
Remember, being eco-friendly doesn’t mean you have to sacrifice the joys of hot tub ownership.
It’s all about making small, conscious choices that add up to a big impact. And let me tell you, soaking in your tub feels even better when you know you’re doing your part for the environment.
So there you have it, my environmentally conscious hot tub pals. With these tips, you can keep your water crystal clear and your conscience clean. Now, who’s ready for a guilt-free soak?
Conclusion
Wow, what a journey we’ve been on, my hot tub comrades! We’ve covered everything from the basics of shocking to troubleshooting and even how to keep things eco-friendly.
If your head is spinning a bit, don’t worry – that’s totally normal. Hot tub maintenance is an art form, and like any art, it takes practice to master.
Let’s recap the key points we’ve covered:
- Regular shocking is crucial for maintaining a clean, safe, and inviting hot tub.
- Whether you’re Team Chlorine or Team Bromine, proper shocking techniques are essential.
- Avoiding common mistakes can save you time, money, and headaches.
- Consistent maintenance between shocks keeps your tub in tip-top shape.
- Troubleshooting skills are your best friend when things don’t go as planned.
- Being environmentally conscious doesn’t mean sacrificing hot tub enjoyment.
Remember, every hot tub is unique, just like its owner. What works perfectly for me might need a little tweaking for you.
Don’t be afraid to experiment (safely, of course) to find what works best for your tub and your lifestyle.
The most important thing is to stay consistent. Set up a maintenance schedule and stick to it.
Trust me, your future self will thank you when you’re sinking into crystal clear, perfectly balanced water after a long day.
And here’s a little secret: the more you do it, the easier it gets. What once seemed like a daunting task will become second nature.
Before you know it, you’ll be shocking your tub like a pro, and maybe even sharing your own tips and tricks with other hot tub newbies.
Now, I’d love to hear from you! What shocking techniques have worked best for your tub? Any horror stories or triumphant victories you’d like to share?
Drop a comment below and let’s keep the conversation going. After all, we hot tub enthusiasts have to stick together!
Remember, a well-maintained hot tub is more than just a luxury – it’s a gateway to relaxation, stress relief, and quality time with friends and family.
So don’t let the maintenance scare you off. Embrace it as part of the hot tub ownership experience.
As we wrap up, I want to emphasize one last point: safety first, always. Whether you’re shocking your tub, adjusting the chemistry, or just enjoying a soak, make sure you’re following proper safety guidelines.
Your health and the health of your loved ones is always the top priority.
And hey, if you’re ever feeling overwhelmed or unsure, don’t hesitate to reach out to a professional.
Sometimes a little expert advice can go a long way. There’s no shame in asking for help – we’ve all been there!
So, my fellow hot tub enthusiasts, are you ready to take your hot tub game to the next level?
Armed with the knowledge we’ve covered today, you’re well on your way to becoming a hot tub shocking master. Remember, every perfect soak starts with proper maintenance.
Now, it’s your turn. Get out there, shock that tub, and enjoy the fruits of your labor. There’s nothing quite like sinking into perfectly balanced, crystal clear water under a starry sky.
Trust me, once you get it right, you’ll wonder how you ever lived without your own personal oasis.
Here’s to clear water, safe soaking, and many relaxing nights ahead. Happy tubbing, everyone!