Alright, folks, gather ’round because I’ve got a shocker for you! Did you know that a neglected hot tub can be a bacterial playground with up to 100 times more germs than your toilet seat?
Yep, you read that right – your relaxing oasis could be a petri dish in disguise. That’s why I’m here to spill the beans on how to keep your hot tub squeaky clean and germ-free.
Listen, I’ve been there – thinking my hot tub was fine just because the water looked clear. Boy, was I wrong!
After a particularly gnarly experience (let’s just say it involved some funky foam and a rash I’d rather forget), I learned the hard way that proper hot tub maintenance is no joke.
So, buckle up, buttercup! I’m about to walk you through the ins and outs of draining, cleaning, and refilling your hot tub.
Trust me, it’s not rocket science, but there are some tricks of the trade that’ll make your life a whole lot easier. Whether you’re a hot tub newbie or a seasoned soaker, this guide’s got something for everyone.
Let’s dive in and get that spa sparkling!
How to Correctly Drain, Clean & Refill Your Hot Tub: A Step-by-Step Guide
To correctly drain, clean, and refill your hot tub, start by turning off the power and locating the drain valve. Once found, connect a hose to the valve and drain the water completely.
After the tub is empty, thoroughly clean it using a spa-safe cleaner, making sure to scrub all surfaces. Next, rinse the tub thoroughly and dry the surface to prevent any residue.
When the cleaning process is complete, close the drain and refill the hot tub with fresh water. Finally, balance the water chemistry and shock the tub to ensure it’s safe for use.
This comprehensive process should be performed every 3-4 months to maintain optimal hot tub health and performance.
Throughout this guide, we’ll delve deeper into each of these steps, providing you with all the necessary information for proper hot tub maintenance.
By following these instructions, you’ll ensure your spa remains a clean, safe, and enjoyable retreat for years to come.
Why Regular Draining and Cleaning is Crucial
Alright, let’s get real for a sec. You know that feeling when you sink into your hot tub after a long day, and it’s like all your troubles just melt away?
Yeah, that’s the good stuff. But here’s the kicker – if you’re not keeping up with regular draining and cleaning, you might as well be soaking in a swamp.
I remember the first time I saw what was lurking in my “clean” hot tub water. Holy moly, it was like a science experiment gone wrong!
You’ve got dead skin cells, body oils, lotions, and all sorts of gunk building up in there. And don’t even get me started on the chemical cocktail that forms over time.
It’s like a perfect storm for bacteria to throw a wild party.
But wait, there’s more! (I sound like an infomercial, don’t I?) All that buildup isn’t just gross – it’s downright harmful to your tub.
I learned this the hard way when I had to replace my pump way earlier than I should’ve. Turns out, all that gunk can clog up your system faster than you can say “hot tub time machine.”
So, what’s the bottom line? Regular draining and cleaning isn’t just about keeping things hygienic (although that’s a pretty big deal).
It’s about protecting your investment, folks! A well-maintained hot tub can last for years and years.
Plus, there’s nothing quite like slipping into crystal clear water that you know is clean as a whistle.
Trust me, once you get into the habit of proper maintenance, you’ll wonder how you ever lived without it. Your skin will thank you, your wallet will thank you, and hey, your hot tub might even thank you if it could talk.
So let’s roll up our sleeves and get down to the nitty-gritty of keeping your aquatic haven in tip-top shape!
When to Drain and Clean Your Hot Tub
Alright, pop quiz, hot shot! When was the last time you drained and cleaned your hot tub?
If you’re scratching your head trying to remember, don’t worry – you’re not alone. I used to be in the same boat, thinking, “If it ain’t broke, don’t fix it,” right?
Wrong! Let me tell ya, timing is everything when it comes to hot tub maintenance.
So, here’s the deal: as a general rule of thumb, you should be draining and cleaning your hot tub every 3-4 months. But hold your horses – it’s not always that cut and dry.
If you’re like me and practically live in your tub, you might need to do it more often. On the flip side, if your hot tub gets about as much action as my gym membership (ahem, rarely), you might be able to stretch it a bit longer.
But how do you know when it’s really time? Well, let me share a little story.
One time, I decided to ignore the cloudy water in my tub, thinking a little extra chlorine would do the trick. Big mistake!
A few days later, I hopped in for a soak and came out smelling like a swamp monster. Not exactly the relaxing experience I was going for!
Here are some tell-tale signs that your hot tub is screaming for a clean:
- The water looks cloudy or has a funky color (trust me, green is not the new blue).
- There’s a strong chlorine smell (ironically, this often means there’s not enough chlorine).
- You’re having trouble balancing the chemicals.
- There’s foam on the water surface (and I don’t mean the good kind from a bubble bath).
- The water feels slimy or sticky.
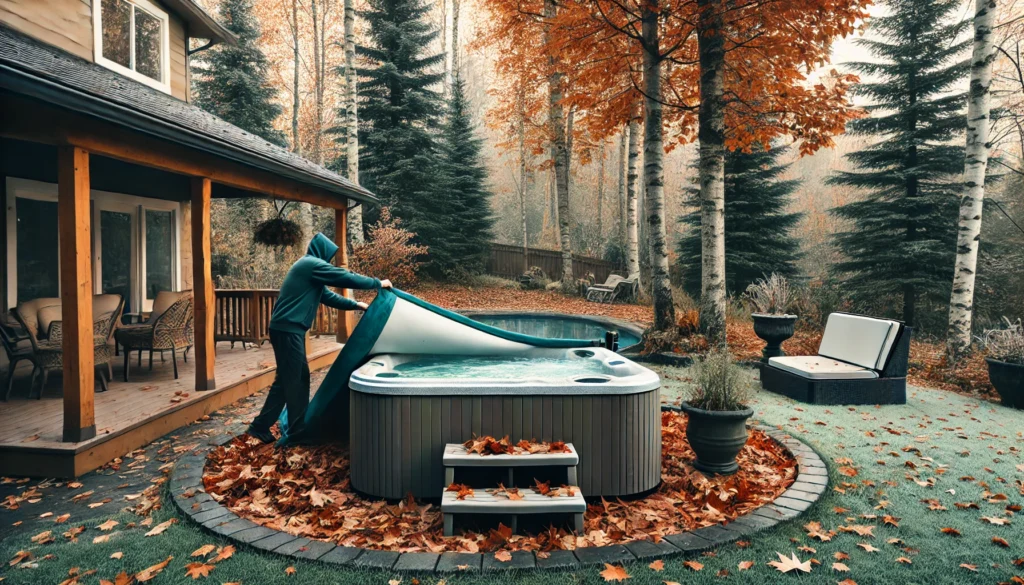
Now, let’s talk seasons. Some folks swear by draining their tub with the changing of the seasons.
It’s not a bad idea, especially if you live somewhere with extreme weather changes. I remember one fall when I put off cleaning my tub, and let me tell you, trying to drain a hot tub in freezing temperatures is about as fun as a root canal.
Pro tip: If you’re planning a big hot tub party (hey, no judgment here), it’s a good idea to drain and clean beforehand. Your guests will appreciate the fresh water, and you’ll avoid any embarrassing “what’s that floating in the water?” moments.
Remember, folks, a clean hot tub is a happy hot tub. And a happy hot tub means happy soakers.
So keep an eye out for these signs, mark your calendar, and don’t be afraid to drain and clean more often if needed. Your future self (and your skin) will thank you!
Preparing to Drain Your Hot Tub
Alright, hot tub heroes, it’s time to roll up those sleeves and get down to business! But before we dive into the draining process, we need to prep like we’re going into battle.
Trust me, I’ve learned the hard way that a little preparation goes a long way in avoiding a hot tub disaster.
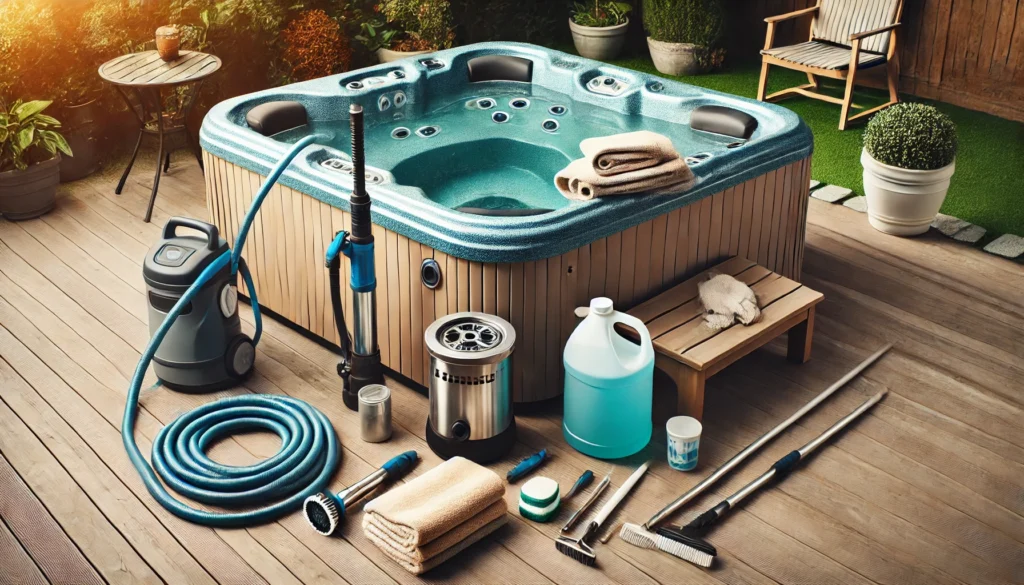
First things first, let’s talk tools. You’re gonna need a few things to get this job done right.
Here’s your hot tub cleaning toolkit:
- A submersible pump (trust me, it’s a game-changer)
- A garden hose (the longer, the better)
- Some spa cleaning solution (the good stuff, not the dollar store knockoff)
- A couple of soft cloths or sponges
- A vacuum (wet/dry shop vac if you’ve got one)
- Some elbow grease (okay, not a real tool, but you’ll need it!)
Now, before you start feeling overwhelmed, let me tell you about the time I tried to drain my hot tub with nothing but a bucket and a dream. Three hours and a very wet pair of shoes later, I realized there had to be a better way.
That’s when I invested in a submersible pump, and let me tell you, it was like going from a bicycle to a Ferrari!
Okay, so you’ve got your tools. Now, let’s talk safety.
I know, I know, it’s not the most exciting topic, but neither is a trip to the ER because you decided to play electrician. First things first, cut the power to your hot tub.
And I don’t just mean turn it off – I mean flip that breaker like it owes you money. Water and electricity are about as compatible as oil and water, folks.
Next up, make sure you’ve got a plan for where all that water is going. Your neighbors might not appreciate a new swimming pool in their basement, if you catch my drift.
Check your local regulations too – some places have rules about where you can drain your hot tub water.
Oh, and a word to the wise: if you’ve recently added chemicals to your tub, wait at least 24 hours before draining. I once made the mistake of draining too soon after a chemical treatment, and let’s just say my prized petunias were not too happy about it.
Last but not least, take a moment to clear the area around your hot tub. Trust me, trying to maneuver a hose or pump around patio furniture is about as fun as a game of Twister gone wrong.
Give yourself some space to work – your back will thank you later.
Alright, troops, now that we’re locked and loaded, it’s time to move on to the main event. Get ready to say goodbye to that old hot tub water and hello to a squeaky-clean spa!
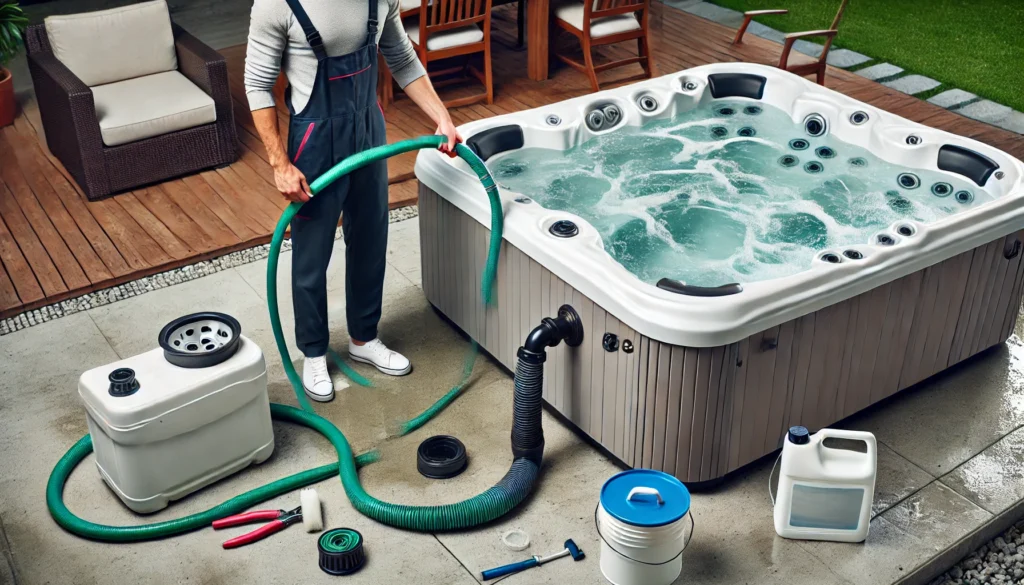
Step-by-Step Guide to Draining Your Hot Tub
Okay, folks, it’s showtime! We’re about to embark on the great hot tub exodus – saying sayonara to all that old, funky water.
Don’t worry, I’ve got your back. Just follow these steps, and you’ll be draining like a pro in no time.
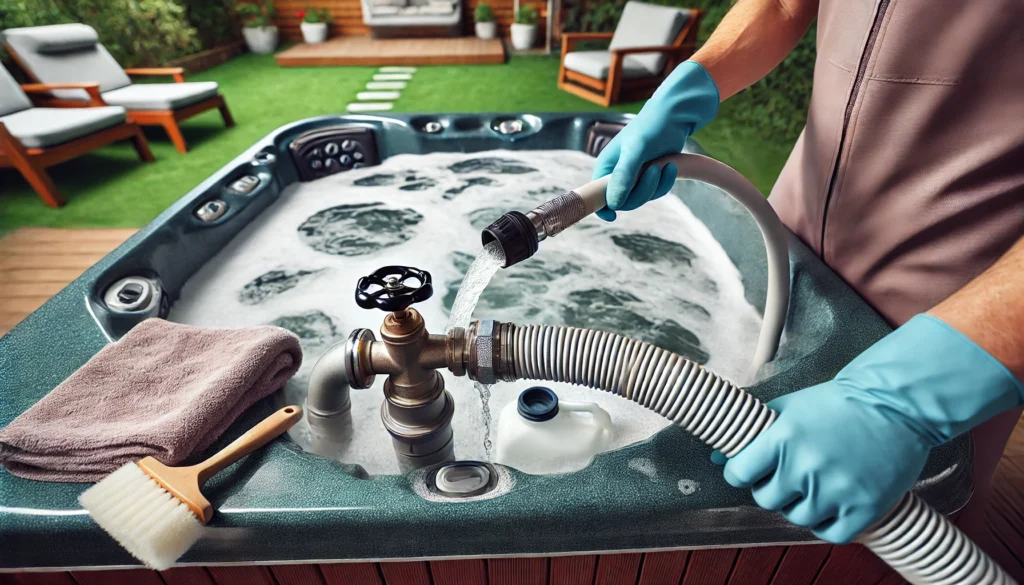
Step 1: Locate the Drain Valve
First things first, we gotta find that drain valve. It’s usually hiding near the bottom of your tub, looking all innocent.
I remember the first time I tried to find mine – I was crawling around like I’d lost a contact lens! Pro tip: check your owner’s manual if you’re really stumped.
Step 2: Attach Your Hose
Once you’ve found the valve, it’s time to attach your garden hose. Make sure it’s screwed on tight – nobody wants a impromptu shower while they’re trying to drain a hot tub.
Trust me, been there, done that, got the wet t-shirt.
Step 3: Open the Valve
Take a deep breath, cross your fingers, and open that valve. If you hear a whoosh and see water flowing, congrats!
You’re officially draining your hot tub. If not, well… welcome to the wonderful world of hot tub maintenance troubleshooting.
Step 4: Play the Waiting Game
Now’s the part where patience comes in handy. Depending on your tub’s size, this could take a while.
I usually use this time to catch up on my favorite TV show or, you know, watch paint dry. Just kidding!
This is actually a great time to start cleaning the filters (but more on that later).
Step 5: Use Your Secret Weapon
Remember that submersible pump I mentioned earlier? Here’s where it becomes your new best friend.
Once the water level gets too low for the drain to be effective, bust out that pump and show that remaining water who’s boss!
Step 6: The Final Stretch
As you get to the last bit of water, you might need to get a little creative. I’m talking about using a wet vacuum, or even just some old towels to soak up the remaining puddles.
It’s like a weird, wet scavenger hunt!
Step 7: Dispose of Water Properly
Remember what I said about not flooding your neighbor’s yard? Yeah, that’s still important.
Make sure you’re draining the water to an appropriate place. Your lawn might enjoy a drink, but your driveway?
Not so much.
Phew! You did it! Your hot tub is now as empty as my fridge after a weekend binge-watching session.
But don’t celebrate just yet – we’re just getting started. Now comes the fun part: cleaning!
Oh, and a little story before we move on. The first time I drained my hot tub, I forgot to close the drain valve before I started refilling.
Let’s just say I spent the next hour wondering why the tub wasn’t filling up, only to find I’d accidentally watered every plant in a 50-foot radius. Don’t be like me – always double-check that valve!
Alright, cleaners, grab your scrub brushes. It’s time to make that tub sparkle!
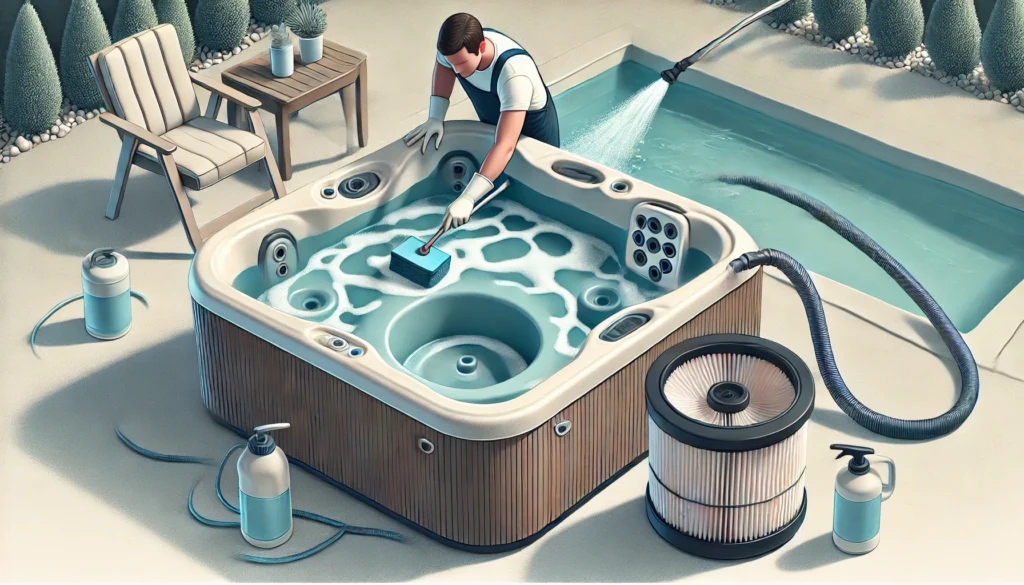
Cleaning Your Empty Hot Tub
Alright, troops, we’ve drained the swamp, and now it’s time for some elbow grease! This is where the magic happens, folks.
We’re gonna turn that grimy tub into a sparkling oasis. So, put on your favorite playlist, maybe grab a beverage (no judgment here), and let’s get scrubbing!
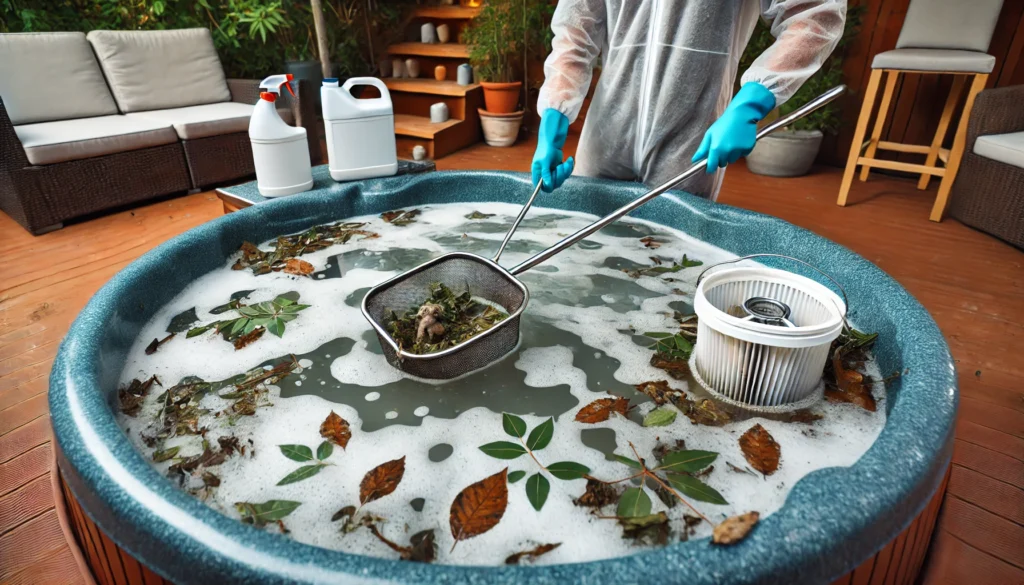
First things first, let’s talk filters. These bad boys are the unsung heroes of your hot tub, trapping all sorts of nasties to keep your water clean.
But even heroes need a little TLC sometimes. Take out those filters and give ’em a good look.
If they’re looking a bit worse for wear, it might be time for replacements. But if they’re still hanging in there, a deep clean will do the trick.
I remember the first time I cleaned my filters – I just gave them a quick rinse and called it a day. Big mistake!
A few weeks later, my water was cloudier than a crystal ball in a dust storm. Learn from my mistakes, people!
Get yourself a good filter cleaner solution and really get in there. Your filters (and your water) will thank you.
Now, onto the main event – scrubbing that shell! Grab your soft cloth or sponge (no wire brushes here, unless you want to scratch up your tub like a cat on a new couch) and some spa cleaner.
Start at the top and work your way down, paying extra attention to the waterline. That’s where all the gunk likes to hang out.
Oh, and don’t forget about those jets! They might look innocent, but trust me, they can harbor more secrets than a teenager’s diary.
I once neglected cleaning my jets and ended up with a foam party every time I turned them on. And not the fun kind of foam party, if you know what I mean.
For the jets, you’ve got a couple of options. You can use a bottle brush to get in there and scrub, or you can fill the tub with a bit of water and some cleaning solution, then run the jets to clean themselves.
I prefer the latter – it’s like letting the tub clean itself while you supervise. Work smarter, not harder, right?
Now, let’s talk about the arch-nemesis of hot tub owners everywhere: scale and biofilm. These stubborn little buggers can build up over time and are tougher to get rid of than that one friend who always overstays their welcome at parties.
Scale looks like a white or grayish buildup, while biofilm is that slimy stuff that makes you go “eww” when you touch it.
I remember the first time I encountered serious scale in my hot tub. I scrubbed and scrubbed, but it was like trying to erase permanent marker with a rubber eraser.
Frustrating doesn’t even begin to cover it! That’s when I learned about the magic of vinegar.
Yep, good old household vinegar can work wonders on scale. Just mix equal parts water and vinegar, apply it to the scaly areas, let it sit for about 15 minutes, then scrub away.
It’s like a mini science experiment in your hot tub!
For biofilm, you might need to bring out the big guns – and by that, I mean specialized biofilm removers. These products are designed to break down that slimy layer of gunk.
Just follow the instructions on the bottle, and watch that biofilm disappear like magic. It’s oddly satisfying, kinda like popping bubble wrap.
Oh, and here’s a pro tip I learned the hard way: pay attention to those nooks and crannies! The corners, around the seats, under the headrests – these are all prime real estate for dirt and grime.
I once thought I’d done a bang-up job cleaning my tub, only to sink in for a soak and feel something slimy under my feet. Talk about a mood killer!
Now, I know what you’re thinking – “This sounds like a lot of work!” And yeah, it can be.
But trust me, the payoff is worth it. There’s nothing quite like the feeling of slipping into a freshly cleaned hot tub.
It’s like the difference between putting on a wrinkled shirt straight from the laundry basket and one that’s been freshly pressed. Both will do the job, but one just feels so much better!
Remember, folks, cleaning your hot tub isn’t just about making it look pretty (although that’s a nice bonus). It’s about creating a safe, healthy environment for you and your guests to relax in.
Plus, a clean tub is a happy tub, and a happy tub means fewer headaches for you down the line.
So, take your time, be thorough, and maybe even put on some tunes to make it more fun. Before you know it, you’ll be done, and you can move on to the next exciting step – refilling your tub with fresh, clean water.
But more on that in a bit!
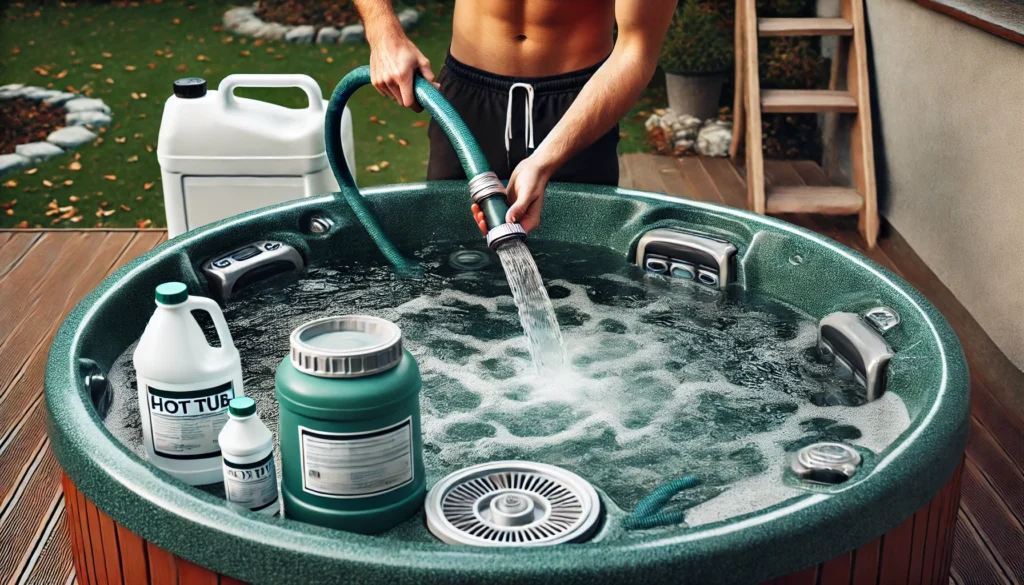
Refilling Your Hot Tub Correctly
Alright, hot tub enthusiasts, we’ve made it to the home stretch! Your tub is sparkling clean, and now it’s time to bring it back to life with some fresh H2O.
But hold your horses – refilling isn’t just about cranking open a hose and walking away. Oh no, there’s an art to this, and I’m about to spill all the secrets.
First things first, let’s talk about your water source. Now, I used to think water was just water, right?
Wrong! I learned this lesson the hard way when I refilled my tub with hard water straight from the tap.
Let’s just say my hot tub looked like it was auditioning for a role in a horror movie with all the stains and scaling. Not cute.
That’s where a hose filter comes in handy. These nifty little devices attach to your garden hose and filter out all sorts of nasties like metals, chlorine, and other impurities.
Trust me, it’s a game-changer. I remember the first time I used one – the water came out so clear, I thought I’d accidentally hooked up to a mountain spring!
Now, let’s get to the actual filling process. Start by putting your garden hose (with the filter attached, of course) into the filter well of your hot tub.
Why the filter well, you ask? Well, it helps circulate the water as it fills, preventing any air pockets from forming in the plumbing.
Clever, right?
As the tub starts to fill, keep an eye on the water level. You want to fill it to about an inch or two above the highest jet.
I once got distracted by a squirrel outside (don’t judge, it was doing backflips or something) and overfilled my tub. Cue water spilling everywhere when I turned on the jets later.
Learn from my mistakes, people!
Oh, and here’s a pro tip: if your tub has air valves, make sure they’re closed while filling. Otherwise, you might end up with a gurgling, bubbling mess that sounds like your tub is trying to communicate with aliens.
Now, once your tub is filled to the right level, it’s time to add some initial chemicals. This is where things can get a bit tricky, so pay attention!
Start with a stain and scale preventer. Trust me, future you will thank present you for this step.
Then, add a bit of pH increaser or decreaser to get your water in the right range (aim for 7.2-7.8).
I remember the first time I tried balancing my hot tub water – it felt like I was back in high school chemistry class, minus the cool safety goggles. But don’t worry, you’ll get the hang of it.
Just remember: small adjustments are key. It’s easier to add more chemicals than to try and undo an overzealous chemical dump.
Lastly, don’t forget to run your jets for about 15-20 minutes after filling. This helps circulate the water and chemicals, and also lets you check for any leaks or weird noises.
Plus, it’s kind of fun to watch – like your own personal water show!
And there you have it, folks! Your hot tub is filled, and you’re one step closer to that relaxing soak you’ve been dreaming about.
But hold your horses – we’re not quite done yet. There’s still one more crucial step: balancing your newly filled hot tub.
But don’t worry, I’ve got your back. Let’s dive into that next!
Balancing Your Newly Filled Hot Tub

Alright, hot tub aficionados, we’re in the home stretch now! Your tub is filled with fresh, clean water, and you’re probably itching to hop in.
But hold your horses! Before you can start living your best spa life, we need to make sure your water chemistry is on point.
Think of it as the final boss in the video game of hot tub maintenance.
First things first, grab your trusty water testing kit. And no, I don’t mean those old test strips that have been sitting in your garage since Obama was president.
Get yourself a good, reliable testing kit. Trust me, it’s worth the investment.
I learned this the hard way when I used some ancient test strips and ended up with water that was more suited for pickling than soaking.
Now, let’s talk pH. This is the big kahuna of water chemistry.
You want your pH to be between 7.2 and 7.8. Too low, and your water will be acidic (hello, skin irritation!).
Too high, and you might as well be bathing in liquid chalk. I remember the first time I got my pH just right – it was like the heavens opened up and the hot tub gods smiled down on me.
Next up is alkalinity. This is like pH’s less famous but equally important cousin.
You’re aiming for 80-120 ppm here. Alkalinity acts as a buffer for your pH, kind of like that friend who holds you back from making bad decisions after a few too many margaritas.
Now, let’s talk sanitizer. Whether you’re Team Chlorine or Team Bromine, you need to make sure you’ve got enough in there to keep the icky stuff at bay.
For chlorine, aim for 1-3 ppm. For bromine, 3-5 ppm is your sweet spot.
I once skimped on sanitizer and… well, let’s just say I ended up with a hot tub that smelled like a swamp monster’s armpit.
Oh, and don’t forget about calcium hardness! This one’s especially important if you filled your tub with soft water.
You want to be in the 150-250 ppm range. Too little calcium, and your water might start eating away at your tub’s surface.
Too much, and you’ll be dealing with scale faster than you can say “pass the loofah.”
Now, here’s where the magic happens – shocking your water. No, this doesn’t involve electricity (please, for the love of all that is holy, keep electricity far away from your hot tub).
Shocking means adding a high dose of sanitizer to kill off any lingering contaminants. It’s like hitting the reset button on your water.
I remember the first time I shocked my hot tub. I felt like a mad scientist, carefully measuring out the shock treatment and pouring it in.
The water fizzed and bubbled, and I half expected it to start glowing in the dark. Spoiler alert: it didn’t, but it did end up crystal clear and ready for action!
After shocking, run your jets for about 20 minutes to circulate everything. Then, test your water again and make any final adjustments.
And voila! You’ve just balanced your hot tub water like a pro.
Now, I know what you’re thinking – “Geez, this sounds like a lot of work!” And yeah, it can be a bit of a dance at first.
But trust me, once you get the hang of it, you’ll be balancing your water faster than a circus performer on a tightrope. Plus, the payoff is so worth it.
There’s nothing quite like sinking into perfectly balanced hot tub water. It’s like being hugged by a cloud… a very warm, bubbly cloud.
So there you have it, folks! You’ve successfully drained, cleaned, refilled, and balanced your hot tub.
Give yourself a pat on the back – you’ve earned it! Now, go ahead and enjoy that well-deserved soak.
Just don’t forget to invite me over for the hot tub party!
Conclusion
Whew! What a journey we’ve been on, huh? From draining the swamp (I mean, your hot tub) to scrubbing it clean, refilling it with fresh water, and finally achieving that perfect chemical balance – we’ve covered it all.
And let me tell you, if you’ve made it this far, you’re officially a hot tub maintenance guru. Go ahead, add it to your resume.
I won’t judge.
Now, I know what you’re thinking. “Do I really have to do this every 3-4 months?” And I get it.
The first time I realized how much work went into maintaining a hot tub, I briefly considered turning mine into the world’s most expensive planter. But trust me, the effort is worth it.
There’s nothing quite like sinking into crystal clear, perfectly balanced water after a long day. It’s like being hugged by a very warm, very wet cloud.
Remember, folks, a clean hot tub is a happy hot tub. And a happy hot tub means happy soakers.
Plus, regular maintenance will save you money in the long run. Trust me, replacing a pump or a heater is about as fun as a root canal, and twice as expensive.
Before I let you go, let me share one last piece of wisdom I’ve learned on my hot tub journey. Always, and I mean always, check that your swimsuit is tied securely before turning on the jets.
Let’s just say I learned that lesson the hard way at a family barbecue. But hey, that’s a story for another time!
Now, go forth and enjoy your sparkling clean, perfectly balanced hot tub. You’ve earned it!
And hey, if you’ve got any hot tub maintenance war stories of your own, drop them in the comments. After all, misery loves company, and hot tub owners love a good laugh.
Stay bubbly, my friends!