
Did you know that the average hot tub holds between 400 to 900 gallons of water? That’s enough to fill about 10 bathtubs!
And here’s another fun fact: Americans love their hot tubs, with over 5.8 million households owning one. As someone who’s been maintaining hot tubs for years, I can tell you that filling one correctly is crucial for a relaxing and safe soaking experience.
It’s not just about turning on a hose and walking away – there’s a bit of art and science to it. Let’s dive into the nitty-gritty of how to fill your hot tub the right way!
How to Fill a Hot Tub Correctly

To fill a hot tub correctly, start by thoroughly cleaning the tub and checking all components for damage or wear. Next, attach a garden hose with a pre-filter to your water source.
Begin filling the tub, monitoring the water level closely. Stop when the water reaches about 1 inch above the highest jet, which is typically around 6 inches below the top of the tub.
Once filled, balance the water chemistry using test strips and appropriate chemicals. This process ensures clean, safe water and proper equipment function.
It’s not rocket science, but there’s more to it than just turning on a hose! We’ll explore the process more deeply below, so stick around for all the juicy details.
Now, let me walk you through the process step-by-step. Trust me, I’ve made every mistake in the book, so you don’t have to!
Preparing Your Hot Tub for Filling
First things first, folks! Before you even think about turning on that hose, you’ve gotta prep your tub.
I remember the time I skipped this step and ended up with a nasty surprise… let’s just say algae and I aren’t on speaking terms anymore!
Start by giving your tub a good once-over. Look for any cracks, loose fittings, or suspicious-looking areas.
Run your hand along the shell to feel for any rough spots or damage. Check the cover for tears or wear – a damaged cover can lead to all sorts of problems down the line.
Trust me, it’s better to find these issues now than when you’re neck-deep in water!
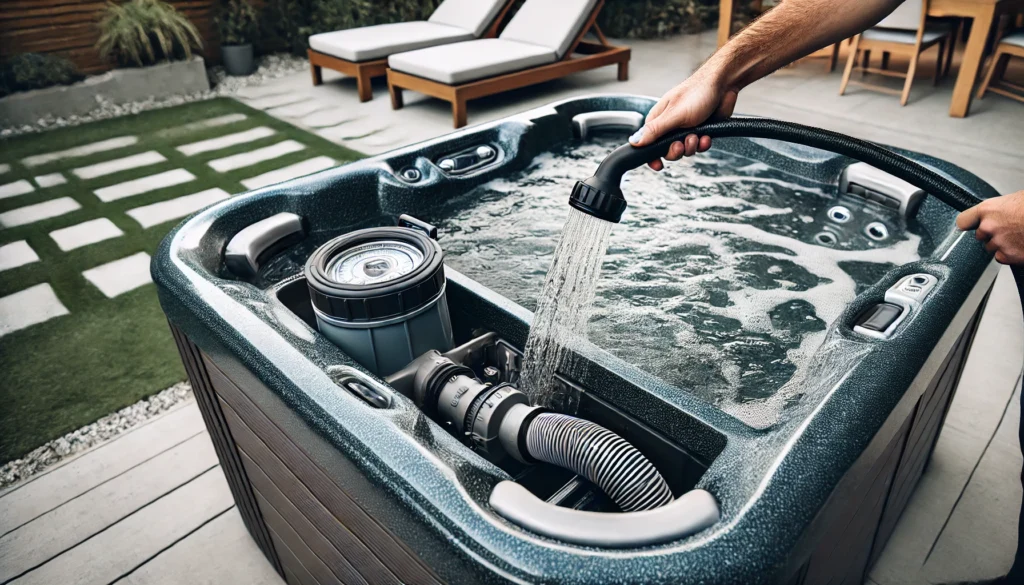
Next, check your filters and pump. Make sure they’re clean and in good working order.
If your filters look dirty or worn, now’s the perfect time to clean or replace them. I once filled my tub with a clogged filter, and let me tell you, it was not a pretty sight.
The water circulation was so poor, it looked like I was trying to create a swamp in my backyard!
Don’t forget to inspect your heater and other electrical components. Look for any signs of corrosion or damage.
If you spot anything concerning, it’s best to call in a professional before you fill up. Safety first, folks!
Lastly, close all valves and drains. This might seem obvious, but you’d be surprised how many times I’ve seen people forget this step.
Double-check everything – the main drain, air valves, and any diverter valves. Nothing’s worse than thinking you’re filling your tub, only to realize you’ve been watering your neighbor’s prized petunias instead!
Oh, and here’s a pro tip: if your tub has been sitting empty for a while, consider giving the plumbing lines a quick flush. You can do this by attaching your garden hose to each jet and running water through for a few seconds.
It helps clear out any stagnant water or debris that might be lurking in there.
Choosing the Right Water Source
Now, let’s talk about where you’re getting that water from. Your garden hose might seem like the obvious choice, and in most cases, it is.
But hold your horses! Not all water is created equal, and the source can make a big difference in your hot tub experience.
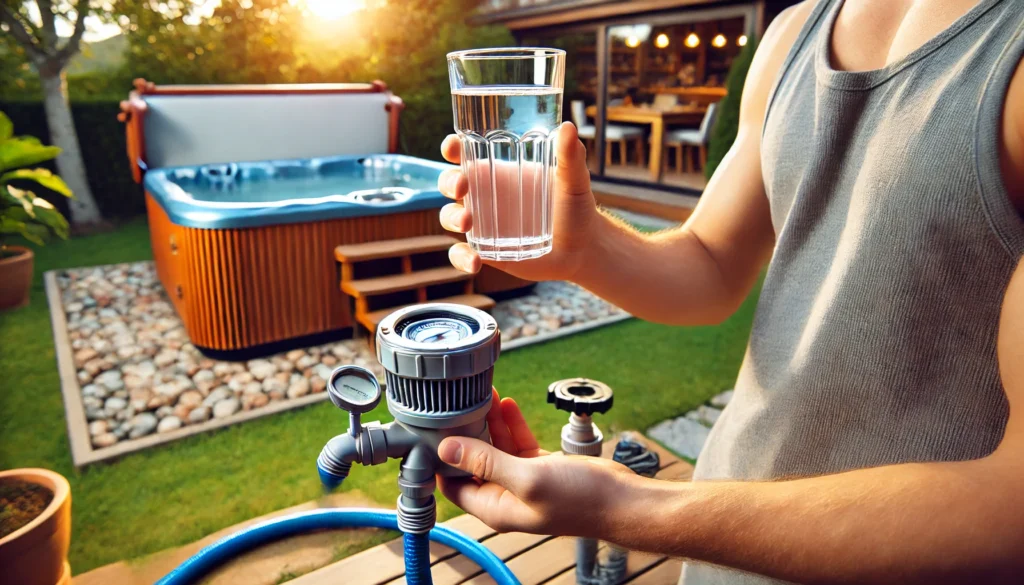
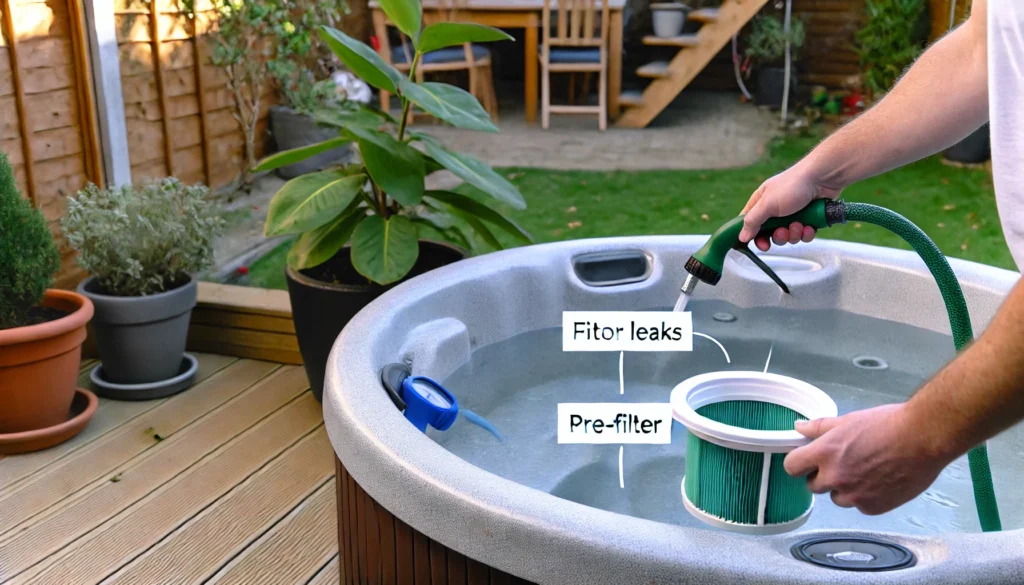
If you’re using well water like I used to, you might want to consider a pre-filter. Well water can contain high levels of minerals like iron and manganese, which can stain your tub and mess with the water chemistry.
I learned this the hard way when my tub turned into a rust-colored mess. Talk about a mood killer!
A good pre-filter can help remove these metals before they cause trouble.
City water folks, you’re not off the hook either. Municipal water often contains chlorine and other chemicals used to treat drinking water.
While these are great for keeping your tap water safe, they can wreak havoc on your tub’s chemistry. A carbon pre-filter can help remove chlorine and other impurities, giving you a better starting point for your hot tub water.
And for the love of all that’s bubbly, don’t even think about using soft water! I made that mistake once, and let’s just say my tub’s pH levels went bonkers.
Soft water can make it difficult to maintain proper pH and can lead to corrosion of your tub’s components. It took me weeks to get it back in balance!
If you’re in an area with particularly hard water, you might want to consider using a hose filter specifically designed to reduce calcium hardness. High calcium levels can lead to scale buildup on your tub’s surfaces and equipment, which is a real pain to deal with.
Here’s a little trick I’ve learned over the years: if you’re unsure about your water quality, fill a clear glass with water from your hose and let it sit overnight. If you see any sediment at the bottom or notice any strong odors, that’s a sign you might need to take extra steps to treat your water before it goes into your tub.
Remember, the quality of your source water can make a big difference in how easy (or difficult) it is to maintain your hot tub over time. Taking a little extra care at this stage can save you a lot of headaches down the road!
Step-by-Step Guide to Filling Your Hot Tub
Alright, it’s showtime! Here’s where the rubber meets the road… or should I say, where the water meets the tub?
Let’s break this down into manageable steps.
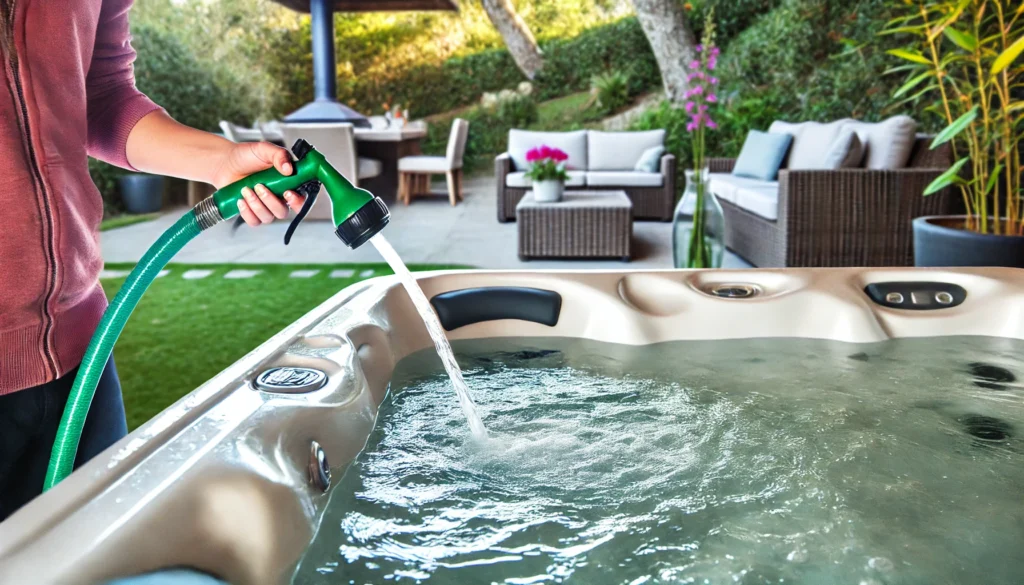
- Attach your hose: First, connect your garden hose (with that pre-filter we talked about) to your water source. Make sure it’s secure – you don’t want it popping off mid-fill and turning your patio into a water park!
If you’re using a submersible pump instead of a hose, make sure it’s placed correctly in your water source.
- Position the hose: Place the end of the hose (or the pump outlet) into the filter compartment of your hot tub. This helps circulate the water as it fills and can prevent air from getting trapped in the plumbing lines.
- Start the flow: Now, start the water flowing. This is where patience comes in handy.
Filling a hot tub isn’t a sprint, it’s a marathon. Depending on your water pressure and tub size, it could take anywhere from 1-2 hours to fill completely.
Use this time to catch up on your favorite podcast or practice your underwater basket weaving skills.
- Monitor the process: Keep an eye on the water level as it rises. You want to stop when the water is about an inch above the highest jet, which is typically around 6 inches below the top of the tub.
Overfilling is a rookie mistake – trust me, I’ve been there. Nothing says “hot tub newbie” like water sloshing over the sides every time you move!
- Check for leaks: As the tub is filling, periodically check around the base and all fittings for any signs of leaks. Catching a leak early can save you a lot of trouble down the line.
- Mind the temperature: If you’re filling with a hose, the water will likely be cold. Don’t worry about this for now – we’ll heat it up after we’ve balanced the chemistry.
- Remove the hose: Once you’ve reached the proper level, turn off the water and remove the hose. Be sure to drain any remaining water from the hose to prevent bacteria growth.
Oh, and here’s a pro tip: if your tub has air jets, keep them open while filling. This helps prevent air from getting trapped in the plumbing.
I learned that one the hard way when my jets started sputtering like an old car!
Remember, filling your hot tub isn’t a “set it and forget it” kind of task. Stay nearby and check on it regularly.
Trust me, you don’t want to be that person who flooded their deck because they got distracted by a cat video marathon!
Balancing Water Chemistry

Now for the science-y bit! Don’t worry, you don’t need a PhD in chemistry for this part, but a little know-how goes a long way.
Proper water chemistry is crucial for both your comfort and the longevity of your hot tub.
First things first, you need to test your water. Get yourself some test strips – they’re like litmus paper, but way more fun!
Dip ’em in and watch the colors change. It’s like a tiny rave in your hand!
Digital testers are also available if you want to get fancy, but good old test strips work just fine for most folks.
You’re looking at a few key things here:
- pH: This should be between 7.2 and 7.8. Too low, and your water becomes acidic, which can irritate your skin and eyes.
Too high, and you risk scale formation and cloudy water.
- Alkalinity: Aim for 80-120 ppm (parts per million). This acts as a buffer for your pH, helping to keep it stable.
- Sanitizer levels: If you’re using chlorine, you want 1-3 ppm. For bromine, shoot for 3-5 ppm.
This keeps your water clean and safe.
- Calcium hardness: Keep this between 150-250 ppm. Too low can lead to corrosion, too high can cause scaling.
Trust me, I once got these wrong and ended up with water that felt like it came straight from the Dead Sea. Not fun!
Based on your test results, you’ll need to add some chemicals. This might include pH up or down, alkalinity increasers, or sanitizers like chlorine or bromine.
Follow the instructions carefully – this isn’t the time to channel your inner mad scientist!
Here’s a tip: add chemicals one at a time, waiting at least 20 minutes between each addition. This gives them time to circulate and do their thing.
And always add chemicals to water, never water to chemicals!
Don’t forget about shock treatment. This helps oxidize contaminants and keeps your water crystal clear.
I like to do a shock treatment right after filling, and then weekly during regular use.
Remember, balancing your water chemistry isn’t a one-and-done deal. You’ll need to test and adjust regularly, especially after heavy use or if you’ve had the cover off for a while.
But trust me, the effort is worth it when you sink into perfectly balanced, comfortable water!
Common Mistakes to Avoid When Filling a Hot Tub
Let me tell you, I’ve made every mistake in the book when it comes to filling hot tubs. But hey, that’s how we learn, right?
Here are some common pitfalls to watch out for:
- Overfilling: I once filled my tub to the brim, thinking “more water, more fun!” Wrong! As soon as I got in, it was like a tidal wave hit my deck.
My dog still gives me the side-eye whenever I go near the tub now. Remember, leave some space for displacement when people get in!
- Using untreated water: I tried this once, thinking I’d save some cash on chemicals. Bad idea!
My tub turned into a science experiment gone wrong, with algae and who-knows-what growing in it. Lesson learned: always treat your water!
- Ignoring manufacturer guidelines: Please, for the love of all things bubbly, read your manufacturer’s guidelines! I once ignored these, thinking “How hard can it be?”
Well, let’s just say I ended up with a very expensive lesson in humility and a repair bill that made my wallet cry.
- Forgetting to clean before filling: Skipping the cleaning step is like putting on dirty clothes after a shower. You’re just asking for trouble!
Always clean your tub before filling.
- Not using a pre-filter: I learned this one the hard way when I filled my tub with water straight from the hose. The result?
A cloudy, mineral-laden mess that took forever to sort out.
- Adding chemicals in the wrong order: There’s a reason for the order in which you add chemicals. Mixing them up can lead to ineffective treatment or even dangerous reactions.
Always follow the instructions!
- Heating the water too quickly: Patience is a virtue, especially when it comes to heating your hot tub. Cranking up the heat too fast can stress your heater and waste energy.
Slow and steady wins the race!
- Not checking for leaks: I once filled my tub without checking for leaks, only to find a small pond forming under my deck a week later. Always keep an eye out for any signs of water escaping where it shouldn’t.
Remember, filling a hot tub isn’t rocket science, but it does require attention to detail. Take your time, follow the steps, and you’ll be soaking in comfort before you know it!
Maintaining Water Level After Initial Fill

Alright, so you’ve filled your tub like a pro. Job done, right? Wrong!
Maintaining the right water level is an ongoing process that’s crucial for keeping your hot tub running smoothly.
Make it a habit to check your water level regularly. I like to do it every time I use the tub.
It’s like a little ritual – check the water, adjust if needed, then relax! A good rule of thumb is to keep the water level at about the middle of the skimmer opening.
This ensures proper filtration and prevents damage to your pump.
You’ll need to top off your tub from time to time. Evaporation happens, especially if you’re using your tub a lot (lucky you!)
Factors like temperature, humidity, and how often you use the cover can all affect how quickly you lose water. In my experience, I usually need to add a few inches of water every week or two.
When you do add water, remember to recheck and adjust your water chemistry. Even a small amount of fresh water can throw off your carefully balanced chemicals.
It’s a good idea to test and adjust after each top-off.
And if you’re losing water faster than normal, don’t ignore it! I once did, and ended up with a leak that turned my backyard into a swamp.
Not exactly the oasis I was going for! Rapid water loss could indicate a leak, which needs to be addressed ASAP to prevent damage to your tub and surroundings.
Here’s a pro tip: if you’re not sure if you have a leak or just high evaporation, try the bucket test. Fill a bucket with water to the same level as your hot tub and place it on one of the steps.
Mark the water level in both the bucket and the tub. After 24 hours, compare the levels.
If the tub has lost more water than the bucket, you might have a leak.
Don’t forget about your hot tub cover! A good, well-fitting cover can significantly reduce water loss through evaporation. Make sure your cover is in good condition and fits snugly.
If it’s waterlogged or damaged, it’s time for a replacement.
Lastly, be mindful of splash-out. If you’re hosting hot tub parties (and who doesn’t love a good hot tub party?), remind your guests to keep the water in the tub.
A little splashing is fun, but too much can lower your water level quickly and make a mess of your deck.
Remember, consistent maintenance is the key to a happy, healthy hot tub. Keep an eye on that water level, and your tub will thank you with years of bubbly bliss!
Conclusion
Well, folks, we’ve come to the end of our hot tub filling journey. Who knew there was so much to learn about putting water in a big ol’ bathtub, right?
From choosing the right water source to balancing chemicals and maintaining the perfect water level, filling a hot tub is both an art and a science.
Remember, filling your hot tub correctly is key to enjoying a safe, comfortable, and relaxing soak. Each step is important, from the initial cleaning and prep to the ongoing maintenance of water levels and chemistry.
Don’t skimp on the details – your future relaxed self will thank you!
Here are the key takeaways:
- Always clean and inspect your tub before filling.
- Use a pre-filter to ensure the best water quality.
- Fill to the correct level – about an inch above the highest jet.
- Balance your water chemistry carefully and regularly.
- Maintain proper water levels and adjust chemistry as needed.
- Keep an eye out for leaks or unusual water loss.
- Use and maintain a good quality hot tub cover.
Remember, a well-maintained hot tub is a joy to use and can provide years of relaxation and health benefits.